
As the weather is getting a bit colder, I thought I would post the recipe for one of my favourite comfort bakes at this time of year. This cake is super simple, yet super pretty, and it great for packing in your lunch box to take to school/work.
Ingredients:
- 225g of butter
- 225g of caster sugar
- 275g of self-raising flour
- 2 teaspoons of baking powder
- 1 teaspoon of vanilla extract
- 4 large eggs
- 4 tablespoons of milk
- 2 tablespoons of cocoa powder
- 30g of milk or dark chocolate
- 30g of white chocolate
Method:
1) Preheat the oven to 180°C (160°C fan), and grease a 30 x 23cm tin, and then line the base with baking parchment.
2) Measure the butter, sugar, flour, baking powder, vanilla extract, eggs and milk into a large mixing bowl, and beat until well blended.

3) Use a tablespoon to put dollops of the mixture into the prepared tin. You should leave about half of the mixture in the bowl for the next step.
4) In a mug or small bowl, mix the cocoa powder with 1-2 tablespoons of boiling water to form a paste. Add this paste to the remaining cake mixture and beat well.
5) Again use a tablespoon to dollop the chocolate cake mixture into between the blobs of vanilla. It should look something like the photo below.

6) Use a spatula to swirl the colours together a bit, also making sure to push the mixture to the edges of the pan.

7) Bake in the pre-heated oven for about 35-40 minutes, until the cake has begun to shrink away from the sides of the pan.
8) Leave to cool in the tin for a few minutes, and then turn the cake out onto a wire rack so it cools more quickly.
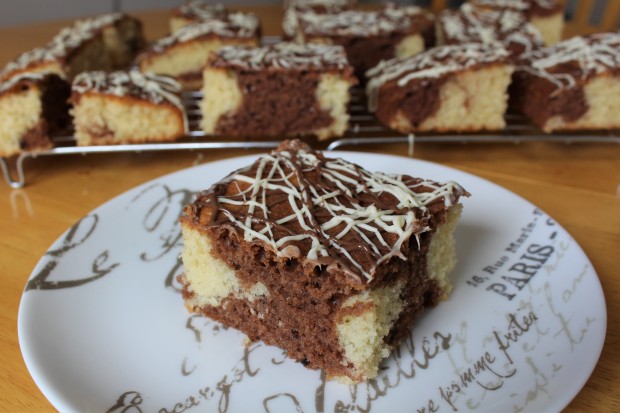
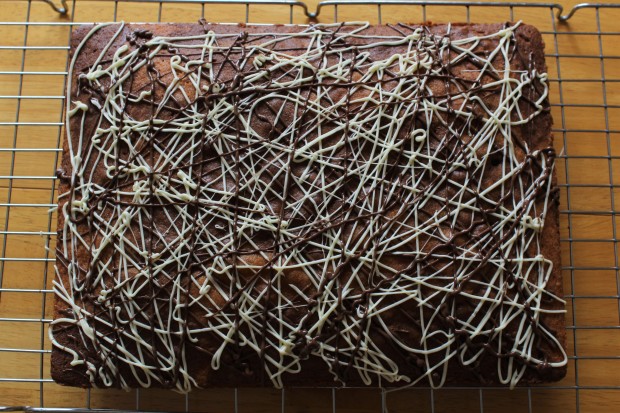
9) Melt down the white and milk/dark chocolate in separate bowls, and the use a teaspoon or piping bags to drizzle over the cake. The more random the better!

10) Leave the chocolate to set, and then cut into 21 slices.

This cake is a favourite in my house, and guaranteed to vanish from the cake tin before I’ve had a chance to have a second slice! It always stays lovely and moist, and is a quick and simple bake that looks like you put a lot more effort into it than you actually did.
I hope you enjoyed this recipe and let me know in the comments if you try it out yourself.
Em x
